You can take any kind of everyday ordinary thing and turn it into something new and different with a blindfold. Blindfolds are simple, inexpensive, and yet open a world of creativity... and that's what we did today.
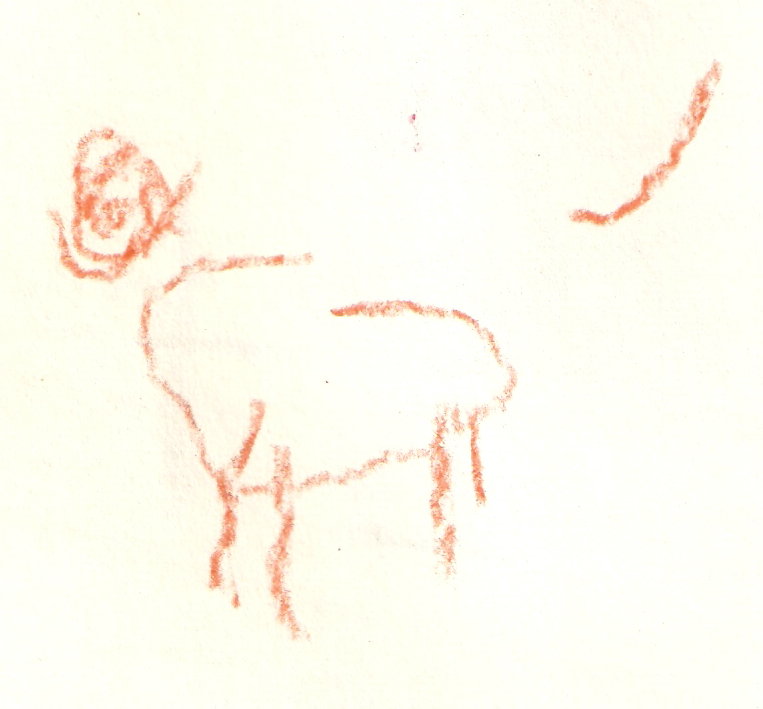
I took a sheet of paper and taped it to the wall at eye level height for my son. Then I pulled out one of my scarves and wrapped it around his eyes. I didn't intend on spinning him, but he insisted, so pinata style I spun him around a few times. Then, armed with a crayon he went after that sheet of paper. I told him to draw a picture of a dog.
My daughter and I laughed at him trying to draw, and he laughed at how hard it was, and then he took the blindfold off and we laughed some more at how funny his picture turned out. Then it was my daughters turn. I taped another piece of paper a little lower for her and we did the same thing. Her picture was of a sandwich.
I know, it doesn't look like much of a sandwich, but that just made for even more laughter. Next was my turn. I really didn't want to be spun around (I get motion sick on the smallest of rides) but the kids really wanted to spin me, so I let them. [Ugh.] Three times was too many, but I still managed to draw a decent cat, bunny, and sun.
Then the game got crazy. They wanted to keep making new drawings, but they got quite silly. My son didn't want to try and go to the paper to draw. Instead, he wanted to run around the living room dizzy, blindfolded, and with a crayon in his hand. Not a fun thing for a parent to watch! My daughter wasn't getting as crazy. She wanted to keep drawing, but she peeked an awful lot on this monkey (and sun)!
I called an end to the game after my son decided to take the scarf and tie it around his ankles and hop around... and fell (who'd have guessed that?). Even with the silliness that came out of the seemingly simple game, I'd still recommend this activity to try. Just be aware of what your children might want to do with a blindfold in their hands!
Showing posts with label crayon. Show all posts
Saturday, July 14, 2012
Thursday, June 21, 2012
Star Crayons
This is one activity that I've been wanting to do for a long time. I've been on the hunt for good silicone molds to make crayons, but haven't seen any that I liked. Then earlier this week I saw these rubber star shaped ice cube trays at Target and I knew they'd be perfect. With 5 pointy parts on each crayon, that's 5 times the sharp ends for the kids to wear down. So here's how to make them.
First have the kids go through your crayon box and take out the broken pieces. Sort them by similar color, then take off all the paper.
Now for your part. Take an empty can (this one is from some pineapple we ate for lunch). Wash it and be careful not to cut yourself on any jagged edges.
Put the crayons in can. Take a small pot and cover the bottom with about an inch of water. Put the can in the pot, making a sort of double boiler.
Turn the stove on to medium heat and let the wax melt.
Use a set of pliers to securely pick up the hot can when all the wax has melted. I put a hot pad mitt on my other hand, just in case.
Pour the melted wax into your mold. Let it sit in one spot until it cools. It might sink in the middle as it cools.
If you're using a silicone mold it's a little easier. You can place the broken crayon pieces directly in the mold. Then place on a cookie sheet and pop it in the oven turned on low. Let it sit for about 10-20 min, checking frequently. Remove from the oven when all the wax is melted and let it cool on the counter. Do not try this with rubber molds, because they might melt in the oven as well.
The kids thought it was so cool to color with stars. My son kept asking for swirled colors, so we just might have to make more.
First have the kids go through your crayon box and take out the broken pieces. Sort them by similar color, then take off all the paper.
Now for your part. Take an empty can (this one is from some pineapple we ate for lunch). Wash it and be careful not to cut yourself on any jagged edges.
Put the crayons in can. Take a small pot and cover the bottom with about an inch of water. Put the can in the pot, making a sort of double boiler.
Turn the stove on to medium heat and let the wax melt.
Use a set of pliers to securely pick up the hot can when all the wax has melted. I put a hot pad mitt on my other hand, just in case.
Pour the melted wax into your mold. Let it sit in one spot until it cools. It might sink in the middle as it cools.
If you're using a silicone mold it's a little easier. You can place the broken crayon pieces directly in the mold. Then place on a cookie sheet and pop it in the oven turned on low. Let it sit for about 10-20 min, checking frequently. Remove from the oven when all the wax is melted and let it cool on the counter. Do not try this with rubber molds, because they might melt in the oven as well.
The kids thought it was so cool to color with stars. My son kept asking for swirled colors, so we just might have to make more.
Subscribe to:
Posts (Atom)