While we were at the fair yesterday, sitting and watching the people doing the pottery demonstration, I mentioned to my son that I think I know how we can make some pots at home. Well, I think that's all he thought about from that moment on, because when we got home last night, as tired as we all were, he asked again and again if we can make pots. I told him we'd talk about it tomorrow.
Well, rise and shine first thing this morning and he's asking me when we can make some pots. I got him to hold off until after breakfast, and after getting dressed, and then I couldn't hold him at ease any longer... the pot making began.
The recipe is really quite simple.
1/2 c salt
1/2 c flour
1/4 c water
I used whole wheat flour so they turned out brown, but if you use white flour you'll have a white "clay".
Mix everything together until it forms a ball.
Shape as desired. We cut out a circle using the top of a scoop.
Then coil some clay snakes around the circle. We smooshed the sides together with our fingers.
Bake at 200 degrees for about 3 hours. The bottoms of our pots were kind of thick so they were a little soft still. We turned them upside down, exposing the soft part, and baked for another hour.
They have a little sparkly look to them when finished. We haven't decided yet if we're going to paint them or not, but chances are good that we will... everything seems to end up painted in this house.
Showing posts with label recipe. Show all posts
Monday, August 6, 2012
Friday, August 3, 2012
Round Cereal Bars Recipe
I'm only human after all. This entire week has slipped past me with out posting our activities! I usually sit down to type after the kids go to bed, but with the Olympics on I've been glued to the TV and have left my computer to sit and collect dust.
Here's a recap of some of the things that happened this week. There was a guys fishing day, where the boys went out to the lake to see what they could catch (which ended up being nothing, but the bonding was good).
While they did that we had a girls day in which we made heart shaped purple cookies, painted our toe nails, played with the princess dolls and watched a girl movie uninterupted by big brother complaining about it.
This week we also went to a street fair and shared a funnel cake, went swimming, rode our bikes, spent even more time at the park, and watched the sun set.
To refuel ourselves today I made a batch of cereal bars. They're kind of like a Nutrigrain Bar base. There are several variations you can make from this recipe, based on your taste, what you have on hand, and how nutritionally packed you're trying to make them. I've tried to include all these options in the easiest to read format.
Round Cereal Bar Recipe
Combine
1 c rolled oats
1 c whole wheat flour **or 3/4 c white flour + 1/4 c wheat germ**
2/3 c brown sugar
1/2 tsp baking soda
1/2 tsp salt
**optional add 1 scoop protein powder or 1/4 c powdered milk
Add
1/4 c oil **or 2 T oil + 2 T unsweetened applesauce**
1 egg **or 1 T milled flax seed + 2 T water**
1 tsp vanilla
1/4 c apple juice **or white grape juice**
**optional add 2 T pureed veggies, yams work well with recipe
Optional (but highly recommended) Stir In
1/2 c to 1 c any combination of nuts, seeds, dried fruit &/or choc chips
(I personally like to add mostly healthy add ins, what ever I have handy, and then
just a sprinkling of choc chips to make the kids think they're getting a sweet treat.)
There's two options to bake the treat. My favorite is #1 because it is easy to transport so this snack can be taken on outings without falling apart. Option #2 is better for at home snacks.
#1. Grease a 24 cup mini muffin tin. Fill tins 2/3 full. Depending on how many fruits and nuts you added it might not fit nicely in 24. You can either bake it in 2 batches, or put the remainder in a random dish and bake one big treat, or fill them all the way full and just have big snacks (they're harder to get out when you do this). Bake at 325 for about 20.min, until set and browned. Cool for about 5-10 min before removing, and then let cool completely before storing.
#2. Spread mixture evenly into a greased 13 x 9 pan. Bake at 325 for 30-40 min until golden brown. Cool completely. Cut into bars.
I over filled my tins a little and you can see in this picture what happened. You don't want them spilling over the sides like that. It makes it harder to take them out.
And you get crumbling like this.
Crumbled or not this recipe is a winner. It never fails that when I take this snack kids gobble it up and moms want to know how to make them. I took a batch to a play date at a friends house today and there were none left over to take home.
Friday, July 27, 2012
Olympic Pizza & Olympic Flags
From the time I was a little girl I've always adored the Olympics. My husband's a huge fan too and the kids have picked up on the energy as they've counted down the days to the opening ceremonies. With that much excitement flowing through our house of course I had to come up with a fun way to make a party out of tonight. Olympic Pizza was my answer!
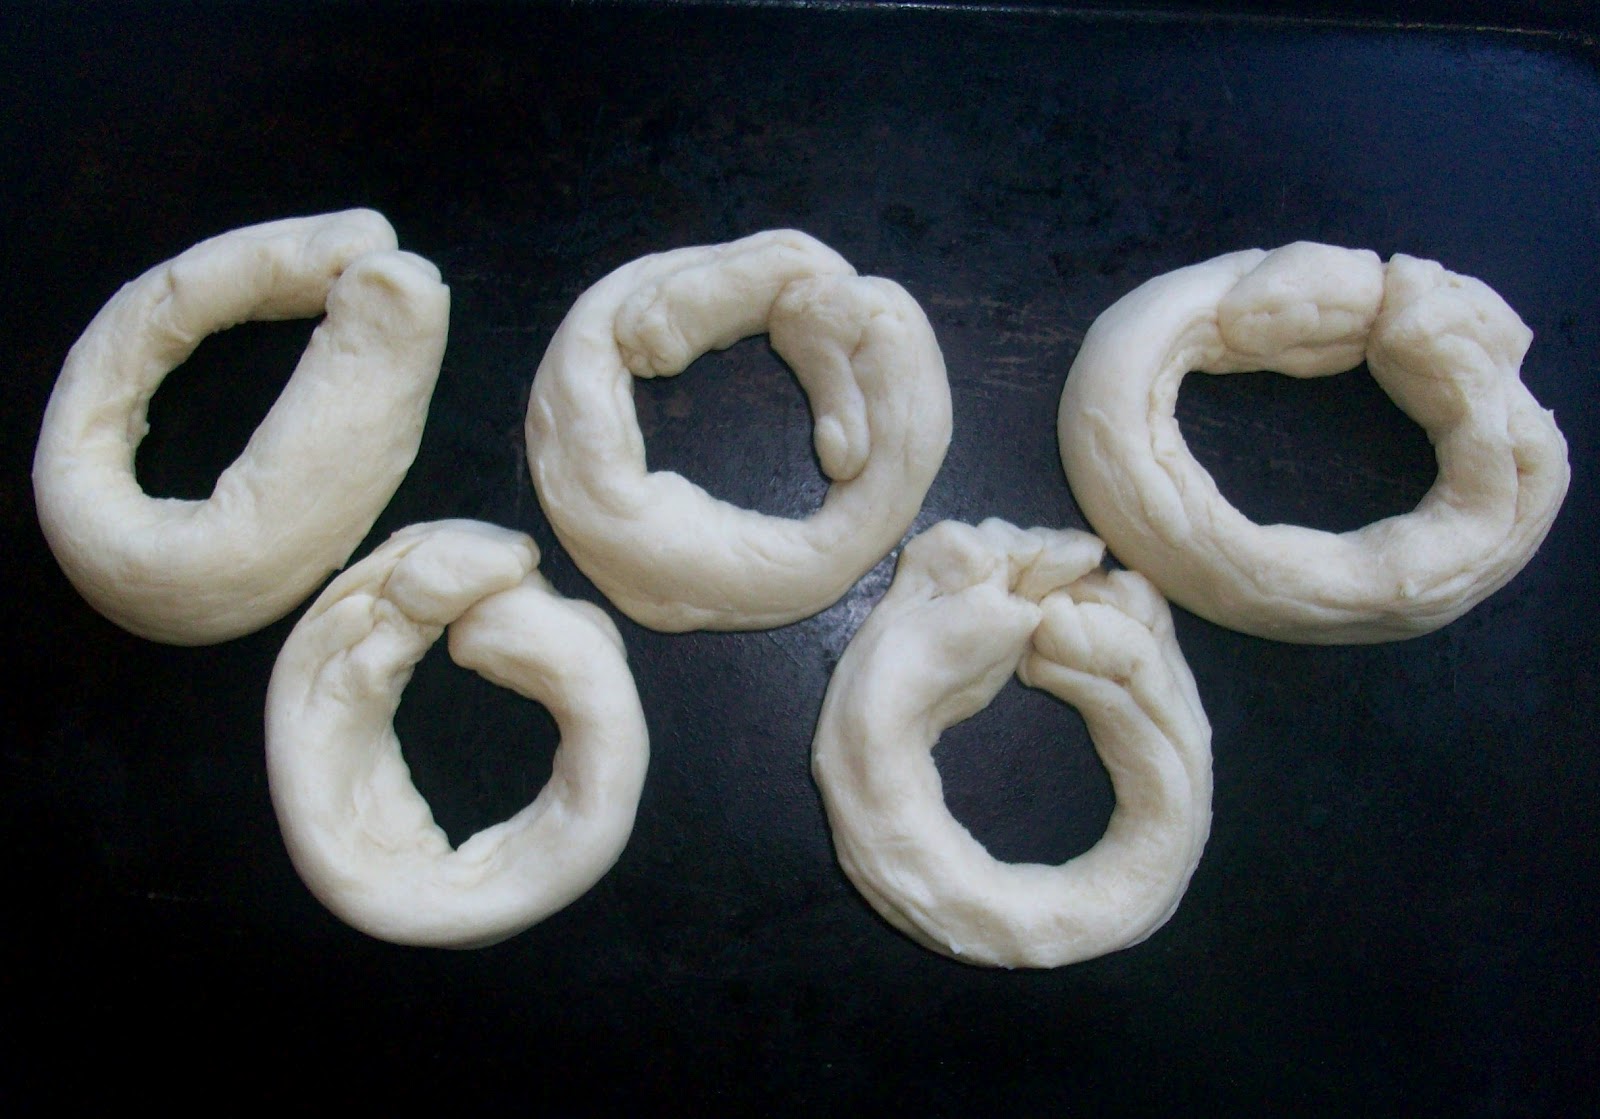
I was going to make some pizza dough from scratch, which really isn't hard if you have a bread machine. Just dump the ingredients in the machine, turn it on, and come back and hour and a half later and you've got dough! But I spent too much time at the park with a friend, and so I stopped by the store on the way home and picked up some refrigerated pre-made roll dough. First divide the dough into 5 equal parts. Roll them out into a tube.
Connect the ends of each tube making a circle.
Place on cookie sheet in the shape of Olympic rings, 3 on top, 2 on bottom.
Now (this was my kids favorite part) smoosh the dough flat.
Cover with mozzarella cheese and bake according to package directions. Voila! When done serve with pizza sauce to dip it in.
The flags are such a big part of the parade of nations which made me think that the kids would like a flag of their own to wave while watching it. I started with a piece of off white canvas. I was going to hem it, but that seemed like too much work. So I just cut it with some pinking shears. It's approximately 6"x9". I drew the Olympic rings on it with pencil, tracing around the base of a small glass to make a good circle.
The kids then painted their flags with fabric paint.
After the paint dried I hot glued a bamboo skewer to the backside of the flag, hiding the pointy side inside the folded over part of the fabric.
It all was a huge hit! The kids ate more of the pizza than they do when I make it the regular way. And the flags provided much entertainment for them, and I'm sure will continue to be waved enthusiastically the next several days.
I was going to make some pizza dough from scratch, which really isn't hard if you have a bread machine. Just dump the ingredients in the machine, turn it on, and come back and hour and a half later and you've got dough! But I spent too much time at the park with a friend, and so I stopped by the store on the way home and picked up some refrigerated pre-made roll dough. First divide the dough into 5 equal parts. Roll them out into a tube.
Connect the ends of each tube making a circle.
Now (this was my kids favorite part) smoosh the dough flat.
Cover with mozzarella cheese and bake according to package directions. Voila! When done serve with pizza sauce to dip it in.
The flags are such a big part of the parade of nations which made me think that the kids would like a flag of their own to wave while watching it. I started with a piece of off white canvas. I was going to hem it, but that seemed like too much work. So I just cut it with some pinking shears. It's approximately 6"x9". I drew the Olympic rings on it with pencil, tracing around the base of a small glass to make a good circle.
The kids then painted their flags with fabric paint.
It all was a huge hit! The kids ate more of the pizza than they do when I make it the regular way. And the flags provided much entertainment for them, and I'm sure will continue to be waved enthusiastically the next several days.
Sunday, July 15, 2012
Swimming & Cool Whip Pie
A friend of ours recently made some improvements to their pool and invited us over this afternoon for a grand re-opening swim. Considering my children are half fish we hardly ever turn down a chance to swim with friends. This pool was great. It was a mother's dream for being able to relax in the pool with the kids. It had a big stair area, lots of seating nooks in every corner, and a wide stoop that was great for smaller kids to touch bottom and also made a great seating area for grown ups. The center only got to 5 foot at the deepest part, which meant beginning swimmers could play and dive, but never get too deep, and never be too far away from a ledge to hold on to.
I thought it'd be nice to bring a treat to share for when we got out of the pool. The question was what kind of goody to make. It had to be simple, because I wasn't in the mood for complicated. We had some left over graham crackers from all the s'mores we ate while camping last week (the kids devoured the chocolate and the marshmallows, not so much on the crackers) so a pie with a graham cracker crust seemed in order. Combine that with some cool whip and some jello and voila! The perfect light fluffy summer pie!
The pie was a hit! (With the moms and kids... not so much with the hubbies.) Here's my recipe:
Crust:
Melt
1/3 c butter
Add
1 1/2 c crushed graham cracker crumbs
3 T sugar
Press into pie tin. Bake at 450 for 7-10 min. Let cool.
Filling:
Boil
1 c water
Stir in
1 box of your favorite jello (Flavors like strawberry & lemon work great. Grape... not so much)
Mix until dissolved, about 2 minutes.
Add
1 c cold water
Let sit in fridge until cooled off, but not set, about 1 hour. Gently fold in
1 package cool whip
Pour into prepared pie crust. If desired top with a topping, such as mini marshmallows, chocolate shavings, or sprinkles. Let sit in fridge till completely set, about 3-4 hrs. Eat up!
Wednesday, June 27, 2012
Play Dough Dolphin
The local Regal Cinema theater is doing their annual summer movie festival for the kids, showing dollar films on Tuesdays and Wednesdays. Today's selection was Dolphin Tale. Both of my kids love animal movies so I thought this would be a good activity for us. It was. They both loved it! Even my younger one that can sometimes have trouble sitting through an entire film. (Although she had to go to the bathroom at the very end, causing me to miss last 5 minutes! Ahhh!)
As we were leaving the theater the kids wanted to keep the fun from the movie going. So in the car on the way home we came up with the idea of making dolphin sculptures just like the dolphin we just got done watching.
First we made some homemade play dough. I've tried many recipes over the years and like this one because it's not gritty like some homemade versions can get.
Mix together with a wire whisk:
1 c flour
1/4 c salt
2 T cream of tartar
1 c water
1 T vegetable oil
It should look like thick glue.
Cook over med heat stirring with spoon constantly for about 3-5 minutes. You'll know you're done when it turns into a solid ball. Remove from heat.
Add food coloring. We made the whole batch a blue-ish color, trying to make a blue-gray for dolphin skin. Then we started shaping. My son's turned into a shark somewhere along the way, because he thought sharks were "much cooler than dolphins". My daughter made about 8 different versions before she asked me to finish it up for her. (Although she gave me explicit direction while I was sculpting on exactly how it should look.)
We're letting them dry over night (they'll probably take a couple of days) and then we'll have our dolphin keepsakes!
Subscribe to:
Posts (Atom)