Saturday, June 30, 2012

Grocery Store Games

As much as I try and avoid it, errands still need to be run. If I could figure out how to keep all my cupboards and pantry full without making trips to the multitude of stores it seems to take to do this, you'd better believe I'd be jumping on board and doing it! But no, I haven't, so this morning when I put the last roll of toilet paper on the holder I knew that today was an errand day.

I wasn't sure if we'd have time (or energy) for much of an activity after the shopping was done, so I came up with a way to make the shopping an activity for the kids. We played little games at the store. It only took slightly longer to make it through the aisles this way then the normal way, but it was a much more pleasant experience... for all of us.

Here are some things we did:
- Scavenger Hunt: I told them to look for something that they'd then have to find. Sometimes it was an item to put in the cart afterwards (find squiggly noodles), and sometimes it was just a fun things to find (find something really small).
- Reading Fun: I have a new reader, so I would find words in packaging and signs that he can sound out.
- Guessing Game: When turning to go down a new aisle the kids would guess how many things we were going to pick up. They would keep track, counting the items as they went in the cart. It was fun to see how close they were to being right when we reached the end of the aisle.
- Rhymes and Word Games: We do this one a lot. Just singing songs and saying fun little rhymes can be fun in the store.
- ABC Game: Starting at the beginning of the alphabet we would look for something that begins with A. Then move on to B, C, all the way to Z. This game can also be done with colors of the rainbow.

These are all simple things to do, but it made the chore into something fun. Once you start going, I'm sure you can come up with even more than I did.

Friday, June 29, 2012

Puzzle Day

Two nights ago seven o'clock rolled around and I just needed some peace and quiet (two words that I'm still trying to put in my kids' vocabulary). I told the kids that if they wanted to stay in the living room with me they needed to do something quiet, like a puzzle. To my surprise they stopped their jumping game, went over to the game closet and pulled out some puzzles without any rebuttal. The down side was there were 4 pieces missing from my sons super hero puzzle with The Hulk (his favorite super hero for now).

The puzzle was still out on the little table we had set up in the living room. So this morning we looked for the missing pieces. We found them mixed in with another super hero puzzle. This gave me the inspiration to label the backs of all the puzzle pieces to match what puzzle they belonged with. (Can you tell I used to work at a library? haha) And that's where the project began.

It soon became a game to try and put together every puzzle we own, and "assemble" them side by side on the floor. We ran out of hours in the day to get every puzzle we own complete, but we got quite a few done. I estimate we put together 1115 pieces today! I'm pretty impressed at our dedication. :)


Here's an example of what my labeling system looked like. We have 3 Hello Kitty puzzles, one with 24 pieces, one with 48, and one with 63. So the back of each got "H.K. 24", "H.K. 48", and "H.K. 63". Some of the other labels included "Hero 24", "Hero 48", "Hero 63", "ABC" and "Cars".

Thursday, June 28, 2012

Paddle Boarding

Daddy had the day off today. With all of the chores done (Well, not really, I desperately need to go to the grocery store) and all of the family together, we decided to pack a picnic, pick up some paddleboards and head to the beach. We don't own our own paddleboards (not yet anyway), but we can rent them for the day at Sport Chalet for a really good price.


First my husband and son went out while I stayed on the sand reading while my daughter splashed in the water. Then my husband and I took turns going solo while the other stayed back playing with the kids on shore. Then all of us went out together, one parent and one child on each board. We saw fish jumping about a foot and a half out of the water, a flock of pelicans flying directly over us, fishermen casting their lines off the pier we went directly underneath, huge regatta boats, and a bunch of children in sailing school. They were fantastic sights.


When we got back to shore we spent some more time pushing the kids back and forth on, giving them rides on the boards. My son was standing up, pretending he was surfing on it. It was both cute and made me proud that he was showing off some skills. After spending about 6 hrs there we decided it'd been a long enough day and headed home.


This activity unfortunately is not one that I can recommend for everyone because of local geography. But you don't have to be next to the ocean. I know quite a few people that paddleboard on lakes in land. Check your local sporting goods stores to see if they do rentals, or can recommend a place that does, and try something new.

Wednesday, June 27, 2012

Play Dough Dolphin

The local Regal Cinema theater is doing their annual summer movie festival for the kids, showing dollar films on Tuesdays and Wednesdays. Today's selection was Dolphin Tale. Both of my kids love animal movies so I thought this would be a good activity for us. It was. They both loved it! Even my younger one that can sometimes have trouble sitting through an entire film. (Although she had to go to the bathroom at the very end, causing me to miss last 5 minutes! Ahhh!)

As we were leaving the theater the kids wanted to keep the fun from the movie going. So in the car on the way home we came up with the idea of making dolphin sculptures just like the dolphin we just got done watching.

First we made some homemade play dough. I've tried many recipes over the years and like this one because it's not gritty like some homemade versions can get.
Mix together with a wire whisk:
          1 c flour
          1/4 c salt
          2 T cream of tartar
          1 c water
          1 T vegetable oil
It should look like thick glue.


Cook over med heat stirring with spoon constantly for about 3-5 minutes. You'll know you're done when it turns into a solid ball. Remove from heat.


Add food coloring. We made the whole batch a blue-ish color, trying to make a blue-gray for dolphin skin. Then we started shaping. My son's turned into a shark somewhere along the way, because he thought sharks were "much cooler than dolphins". My daughter made about 8 different versions before she asked me to finish it up for her. (Although she gave me explicit direction while I was sculpting on exactly how it should look.)


We're letting them dry over night (they'll probably take a couple of days) and then we'll have our dolphin keepsakes!

Tuesday, June 26, 2012

Jam Session

I play a little guitar. Wait... let me rephrase that... I used to play a little guitar. Now I have a guitar that rests comfortably next to the lounge seat in the master bedroom. It came in really handy back in the day when I lived at camp and lead groups singing songs around the evening bonfire. Way back in the day.

This afternoon we were all pretty hot and I didn't feel like moving much. So I scooped up a bowl of ice cream for the kids (I got zero argument on this idea), get out the old guitar and start strumming.

Now, mind you, I only remember a handful of chords. And I use the same strumming pattern for everything. (My husband thinks that all my songs sound the same.) But the kids don't. Change it up just a little, add different words, and they're jumping around singing and dancing along! They were so into the music that I felt a twinge of regret that I don't play for them more often.

When my fingers were getting soar (which didn't take long, since there's no callus built up anymore) my son took over and started strumming. He was really liking it. The only downfall was that now a guitar is topping his Christmas wish list... it might become an expensive holiday!

If you don't play guitar, or any instrument, that doesn't mean you can't do this same activity. Hop onto You Tube with the kids and start plugging in song titles of all your favorite dance and sing along type songs. Turn the screen off while the song is playing so that you're not focused on the video, but rather the interaction with the people around you. It's a whole lot of fun too. Basically slow down, sing, and really appreciate these precious moments!

Monday, June 25, 2012

Paper Mobile

We got a little creative today and made a mobile. If you're anything like me you might have made one as a kid, and think they're kind of cheezy now that you're all grown up. But my kids are still kids, and still thinking things like that are pretty neat. I have to remind myself of that every now and then. Here's how we made ours.

Start with a cereal or cracker box. Open it up. Take a protractor and draw 2 circles on each of the large panels, one inside the other. I made mine 9 & 8 inches in diameter. What you're making is a 1 inch wide circle on each side. Make it as wide as your space will allow. Cut out your circles.

(A protractor makes better circles than these. I traced my pencil lines with marker so they'd show up in the picture... as you can see I can't draw perfect circle!)
Glue the 2 circles together with some tacky glue. With a black marker mark 12 dots, spaced like the numbers on a clock. Then take a red crayon and mark 4 dots equally apart.


Take a thick safety pin and poke a hole threw each dot. Cut 4 pieces of yarn about 18 inches long. Thread through red dot holes using a yarn needle. Tie around circle and tie all together at top.


Cut some paper roughly into 4 inch squares. I used double sided scrapbook paper, but use what you've got on hand.


Let the kids cut and decorate 12 pieces however they like. Take the safety pin and poke a hole at the top of each decorated piece. Take some thread and a needle and tie a knot at the top of each piece. (**I used thread and yarn. Feel free to substitute for ribbon, twine, fishing wire, etc. Use what you've got.)


For this next step I found it easiest to hang the mobile from a clothes hanger at the top of a door frame. Use the needle and attach each piece to the bottom of the mobile at the prepared black dot spaces. I originally was going to arrange them in a certain order, starting with a really short string and ending with the longest. But that's just not what ended up happening.


At this stage you can decorate the cardboard circles if you want. I had planned on wrapping it in ribbon to give it a finished nice look, but my son was a little too impatient for that. He just wanted to hang it up. So that's what we did.


I hung it from the ceiling in his room with a push pin tack. I'm not sure how good of an idea that was... within 30 seconds he was running and jumping trying to hit it. Then standing up on chairs and jumping off them trying the same thing. But as he was going to bed he said, "Mom, I'm so glad we made that special craft today. I really love my new thing... what's it called again? It makes me happy to look at." That gave me a huge smile to end my day with. :)

Sunday, June 24, 2012

Park Tour

There's days we've gone to the park. There's days we've been to more than one park. But 3 parks in one day with the same group of friends? That was new!

Two of my mommy friends and I were husband-less for the day, so we decided to do a "park tour". The goal was this: try new parks we've never been to before, and keep us all occupied and close to good company. When I told my son what we were doing he was so excited! He thought that was the coolest idea ever!


We picked a new park none of us had been to before and met there at 10 in the morning. It had cool equipment, but everything was about a foot and a half too high off the ground, which made it difficult for the smaller kids to get down from slides. There was no shade over the equipment either, so the kids became extremely sweaty. We lasted about an hour before off we went to park #2!


Again, this was one none of us had been to before. It was completely shaded, which was great. About an hour after we got there tummies started rumbling. Food was definatley our next stop.


There was a shopping plaza with lots of food choices close to park #3. We grabbed some take out and ate it at a picnic table on top of the hill. This was a park I'd been to before, but the other two moms had not. It was a nice one to finish off with because it was fenced in, so we didn't have to worry about any wanderers. However, I thought it had more shade than it really did.

It was about 2:30pm when we left. Everyone was tired, happy, and quite pleased at accomplishing such a feat! Would I do this again? Yes, but I'll need some time to recover first. :)

Saturday, June 23, 2012

Spelling felt board

I wanted to create a fun game type of thing for my to son to play over the summer to help him with his spelling and reading. He learned so much over the school year, and I've heard the horror stories of how kids regress over the summer from not using their new knowledge, and then teachers have to spend the first part of the new year playing catch up. One of my goals is to help my son keep what he's learned fresh so that he's ready to hit the ground running come the fall. So we made a spelling game for our felt board.

I didn't make the board today, so I don't have pictures of how I constructed it. But it's pretty simple to make your own. I took a small bulletin board in which the back side popped out like a picture frame does. I hot glued a large piece of felt over the cork, being careful of where I put my glue lines, just in case you could feel them on the other side. Then put the cork board back in place and voila! Felt board!

For today's project I used 4 different colors of felt. I cut out 26 rectangles approximately 1 inch tall of one color and 26 of another color.


With black fabric paint (the kind that comes in a squeezey bottle) I wrote the upper case alphabet and the lower case alphabet.


Then I cut out strips of a third color felt, the same height, and wrote ending letter combinations of common words with the paint. For example 'ike', 'oad', 'ing', & 'at'. With the fourth felt color I again cut out strips the same size and with the paint wrote common complete words such as 'and', 'the', & 'they'. I let them dry and then I cut the fabric strips so that each word was it's own piece of felt.


Now it's time to let the kids play. We took the word endings and found all kinds of words to make with them, both real and made up. (For example we took the ending 'ill' and made the words 'bill' 'will' 'chill' 'fill' & 'rill'.) Then we made whole sentences and had plenty of laughs at some of the things we came up with. My son's favorite was "I am a doapis". "Doapis" is now our new catch all word in the house. I'm not quite sure what it means, but I've used it many times today! :)

Scooby Snacks

Baking with the kids can be a great bonding experience, a learning time and lots of fun. Today we made dog bone shaped crackers and called them "Scooby Snacks". We used the recipe below. We talked about measuring as we got the ingredients out. The kids did the mixing and the rolling.


When it came time to cut we used mini cookie cutters.


I've been on the hunt for fun mini cookie cutters lately, and have found them trickier to find than I think they should have been. Amazon has a good selection, but you have to pay for shipping too. Then just a couple weeks ago Hobby Lobby opened up in our town. They have a great selection of the minis at a great price.


These ended up being a huge hit. The kids loved them, our friends at the park later on that day loved them, and even my husband (who hates anything that might remotely be healthy, and these had enough wheat germ in them to fit that category) loved them!

The recipe:
Preheat oven to 350.
Combine in mixing bowl:
    2 c whole wheat flour (or 1 1/2c flour + 1/2c wheat germ)
    2 T wheat germ
    1 tsp salt
    1 tsp baking powder
    2 T brown sugar
    2 T powdered milk
Cut in with pastry blender:
    1/3 c butter
Combine separately and stir in:
    1/2 c water
    1 T molasses
Knead a little until smooth. Spray 2 cookie sheet with cooking spray. Roll out dough on lightly floured surface till around 1/8-1/4 inch thick, depending on how thin you like your crackers. Cut into desired shaped and transfer to sheet with small spatula. Spray tops with cooking spray to making a topping stick if desired. Sprinkled with your choice of paprika, garlic, onion, seasoned salt, or cinnamon sugar. Bake 10-12 minutes or until lightly browned.

Thursday, June 21, 2012

Star Crayons

This is one activity that I've been wanting to do for a long time. I've been on the hunt for good silicone molds to make crayons, but haven't seen any that I liked. Then earlier this week I saw these rubber star shaped ice cube trays at Target and I knew they'd be perfect. With 5 pointy parts on each crayon, that's 5 times the sharp ends for the kids to wear down. So here's how to make them.

First have the kids go through your crayon box and take out the broken pieces. Sort them by similar color, then take off all the paper.


Now for your part. Take an empty can (this one is from some pineapple we ate for lunch). Wash it and be careful not to cut yourself on any jagged edges.


Put the crayons in can. Take a small pot and cover the bottom with about an inch of water. Put the can in the pot, making a sort of double boiler.


Turn the stove on to medium heat and let the wax melt.


Use a set of pliers to securely pick up the hot can when all the wax has melted. I put a hot pad mitt on my other hand, just in case.


Pour the melted wax into your mold. Let it sit in one spot until it cools. It might sink in the middle as it cools.


If you're using a silicone mold it's a little easier. You can place the broken crayon pieces directly in the mold. Then place on a cookie sheet and pop it in the oven turned on low. Let it sit for about 10-20 min, checking frequently. Remove from the oven when all the wax is melted and let it cool on the counter. Do not try this with rubber molds, because they might melt in the oven as well.

The kids thought it was so cool to color with stars. My son kept asking for swirled colors, so we just might have to make more.

Wednesday, June 20, 2012

Stopwatch Games

Sometimes a simple little toy can offer hours of fun. The stopwatch was one of those toys for us today. We dug up ours from the bottom of the workout supplies basket (because the stuff in there isn't getting used for it's intended use nearly as often as it should) and made up some games. We started with me giving the directions on what we should do, "Count to '20' as fast as you can" and "Say the alphabet as fast as you can". Then the kids got in the creative fun and started making up their own fun things to time, "Run to that door and back as fast as you can". We eventually stopped when the phone rang, but the game kept being started again all day long.

Some of the other things we timed were:
- How fast you can do 5 jumping jacks and then 5 arm circles
- How long you can stand on one foot
- Drop a balloon and jump over it as fast as you can
- How long it takes to hit a balloon 10 times into the air
- How long you can say "ahhhhh" before you have to take a breath
- We set up an obstacle course with things to go over, under and around and timed each other completing the course

This is definitely one activity where the sky's the limit on what you can do. Start with these ideas and see what you can think of to time next!

Tuesday, June 19, 2012

Lego Day

Yesterday's festivities left all of us pretty wiped out, with very little energy to do much of anything beyond what we had to do. So today's activity was one we could do from the living room floor. We all sat down (laid down at times) and built with the Lego's. We followed the directions for some of the kits we have and built some intricate figures.


We decided it's from Indiana Jones.

There's a bad guy behind those bars 


We also built random things we made up. I didn't get pictures of our really cool Indiana Jones set we created... it was scavenged for parts. But it included a jeep for him, a boat, a plane, a shovel, and a pit of snakes. Here's a few of the things I did get a picture of.

A cheese car.
A birthday cake.


We also played a game of how many different ways can we organize the Lego's. We sorted them into piles by color, shape, size, and kind (my little girls favorite kind are the "flat" pieces). The simplicity of the day was a welcome breath of fresh air after all the planning and energy that went into yesterday, but the time we spent together was no less valuable. I give today a big thumbs up!

A "Titanic" car.
A googly monster with flower hair.


Monday, June 18, 2012

Angry Birds Party

Angry Birds. Is there any kid out there that doesn't know and love these cute little characters? My kids and their friends are definitely all fans. So today we hosted an angry birds party. We invited around 10 friends over and along with a snack table we had two super fun, and much enjoyed bird activities. The first was a craft.


Beforehand I crocheted a ball for the kids to use as a starter. Then the kids got to decorate the birds how they wanted. We used puffy craft pipe cleaners for the the beak, craft feathers cut into 1 - 1 1/2 inch pieces for on top, and google eyes. The kids glued the pieces on with tacky glue. After they made their birds we set up some blocks in a tower, and they threw the birds at the tower to knock it over.


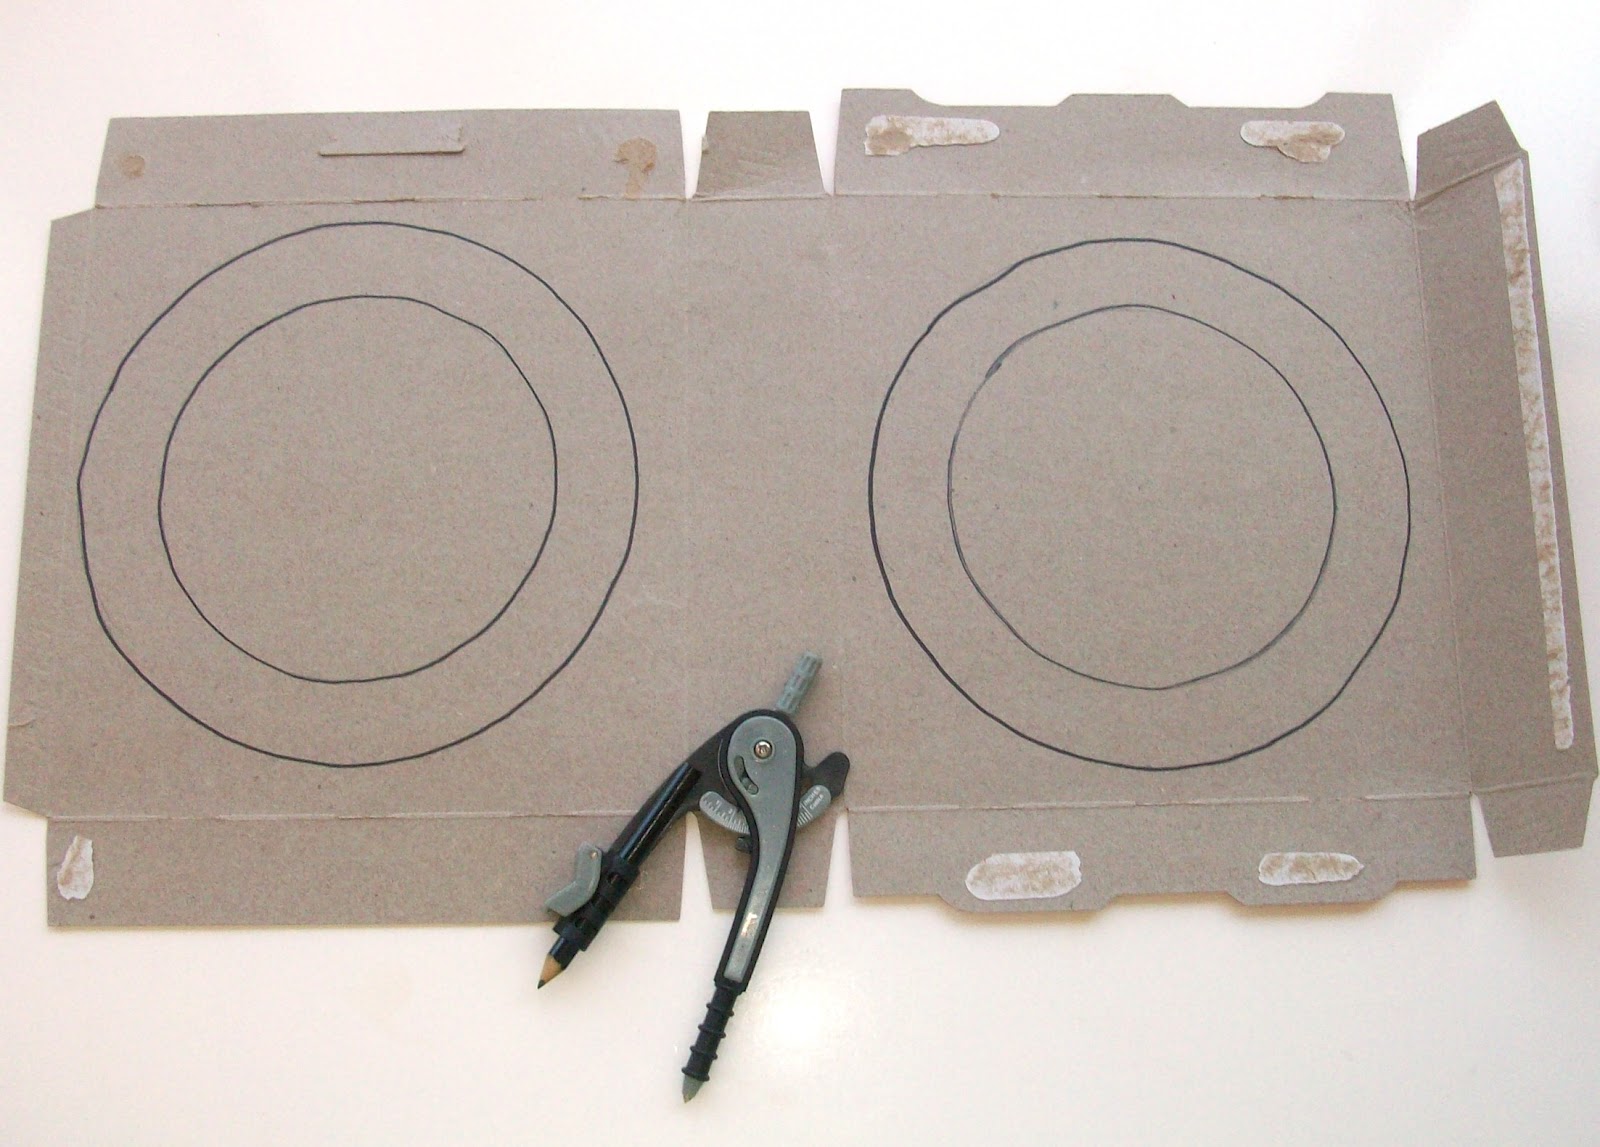
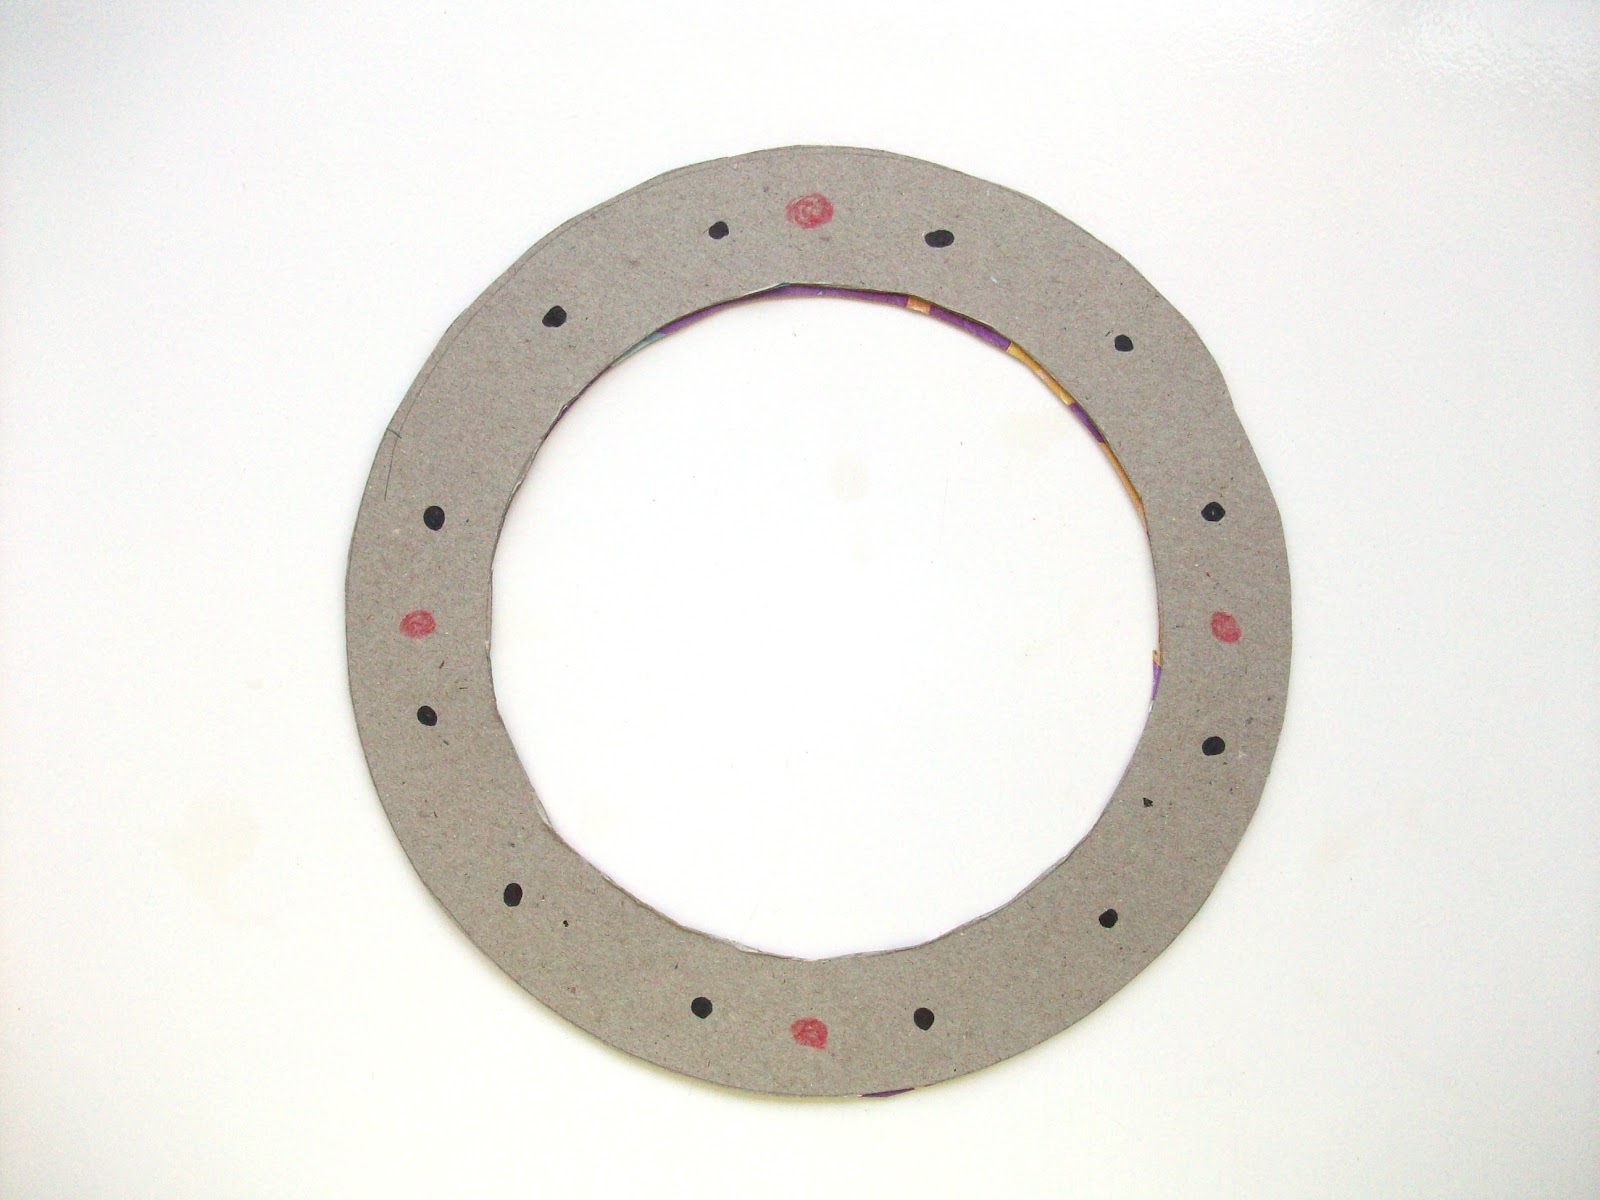
The other game was a bean bag toss. Ahead of time I made a pig bean bag for each child coming. The kids took two boxes we had laying around the house, taped them together, and cut holes in each one. The best way to cut cardboard is to use a serrated steak knife. I have one that is designated as a cardboard cutter that I keep with my craft supplies. In our house the kids draw the lines, and an adult does the cutting.  The kids threw the pigs at the target. I think we started the day with a point value assigned for each hole, but that quickly went out the window and it turned into just a free for all tossing the bean bags.


And what party is complete without a cake?


Directions to crochet a ball:
- Chain 4
- Connect the ends together making a loop (one way to make a magic circle)
- Using the center of the loop single crochet (sc) 9
- Building on top of what you've done sc 9
- Double up in each space on the next row, making a total of 18 sc
- sc 18
- Double up in every other space, making a total of 27 sc
- sc 27
- sc 27
- sc 27
- Do a reduction sc stitch in every other space, bringing the circle down to 18
- sc 18
- Do a reduction sc stitch in every space, bringing the circle down to 9
- Stuff the ball with cotton
- sc 9
- Do a few reduction sc stitches to fill in the hole
- Tie off yarn and hide ends
**An affordable place to look for stuffing is in the home goods sections of a department store. You can pick up a cheap pillow for only a few bucks. Cut it open and use the filling for your crafts.


Directions to make a pig bean bag:
- Draw 2 circles on your fabric of choice. Pick something that doesn't ravel, like felt, or in this case I used fleece. I traced a bowl from the kitchen to make my circles round, and not weird.
- Out of the same fabric cut an oval for the nose and 2 half circle pieces to be ears.
- In white fabric cut 2 circles to be eyes.
- You need a sewing machine for this step. Set it on a zigzag stitch, medium width and close together. Sew the nose just slightly lower then centered on one of the original circles by sealing the ends. Just before you finish sewing the whole nose place a little stuffing inside, then seal it up.
- Sew the eyes on in the same way, except no stuffing. You now have a completed face piece.
- Take the face piece. Lay the ear pieces on top the face, facing inward so they're laying on top of the eyes. The edges of all pieces should line up.
- Lay the remaining circle on top of the pile.
- Sew through all layers, leaving an opening of about 2 inches.
- Turn the bag right side out.
- Fill with 3/8 cup dry beans. Little ones work great. You can also use rice or popcorn kernels.
- Hand stitch the opening closed.