Showing posts with label coloring. Show all posts

Saturday, June 15, 2013

Pirate Treasure Maps <<Argh>>

My (not so) little boy has a birthday right around the corner, and while he's been planning it the last two months, just now have I jumped on board in preparing for it. He's picked a pirate theme for the party, which is interesting because not once has he shown interest in pirates before. But whether it's the lure of sword fighting or... wait... it's gotta just be the sword fighting.

We're putting together goodie boxes in the shape of treasure chests full of things like eye patches, bouncy ball "cannons", pirate gold, hats, and even swords. I figured a treasure map for each kid was in order, so this morning we sat at the computer and cut and pasted clip art from various websites to make or own maps, then printed them in black and white so that the kids could add their own color.

This activity took up some time, which was a good thing. The kids were so excited about it because they were able to feel like they were helping prepare for the party. Here's what our map ended up looking like, printed on cardstock for durability.

Saturday, July 14, 2012

Blindfold Drawings

You can take any kind of everyday ordinary thing and turn it into something new and different with a blindfold. Blindfolds are simple, inexpensive, and yet open a world of creativity... and that's what we did today.

I took a sheet of paper and taped it to the wall at eye level height for my son. Then I pulled out one of my scarves and wrapped it around his eyes. I didn't intend on spinning him, but he insisted, so pinata style I spun him around a few times. Then, armed with a crayon he went after that sheet of paper. I told him to draw a picture of a dog.
My daughter and I laughed at him trying to draw, and he laughed at how hard it was, and then he took the blindfold off and we laughed some more at how funny his picture turned out. Then it was my daughters turn. I taped another piece of paper a little lower for her and we did the same thing. Her picture was of a sandwich.
I know, it doesn't look like much of a sandwich, but that just made for even more laughter. Next was my turn. I really didn't want to be spun around (I get motion sick on the smallest of rides) but the kids really wanted to spin me, so I let them. [Ugh.] Three times was too many, but I still managed to draw a decent cat, bunny, and sun.
Then the game got crazy. They wanted to keep making new drawings, but they got quite silly. My son didn't want to try and go to the paper to draw. Instead, he wanted to run around the living room dizzy, blindfolded, and with a crayon in his hand. Not a fun thing for a parent to watch! My daughter wasn't getting as crazy. She wanted to keep drawing, but she peeked an awful lot on this monkey (and sun)!
I called an end to the game after my son decided to take the scarf and tie it around his ankles and hop around... and fell (who'd have guessed that?). Even with the silliness that came out of the seemingly simple game, I'd still recommend this activity to try. Just be aware of what your children might want to do with a blindfold in their hands!

Monday, June 25, 2012

Paper Mobile

We got a little creative today and made a mobile. If you're anything like me you might have made one as a kid, and think they're kind of cheezy now that you're all grown up. But my kids are still kids, and still thinking things like that are pretty neat. I have to remind myself of that every now and then. Here's how we made ours.

Start with a cereal or cracker box. Open it up. Take a protractor and draw 2 circles on each of the large panels, one inside the other. I made mine 9 & 8 inches in diameter. What you're making is a 1 inch wide circle on each side. Make it as wide as your space will allow. Cut out your circles.

(A protractor makes better circles than these. I traced my pencil lines with marker so they'd show up in the picture... as you can see I can't draw perfect circle!)
Glue the 2 circles together with some tacky glue. With a black marker mark 12 dots, spaced like the numbers on a clock. Then take a red crayon and mark 4 dots equally apart.


Take a thick safety pin and poke a hole threw each dot. Cut 4 pieces of yarn about 18 inches long. Thread through red dot holes using a yarn needle. Tie around circle and tie all together at top.


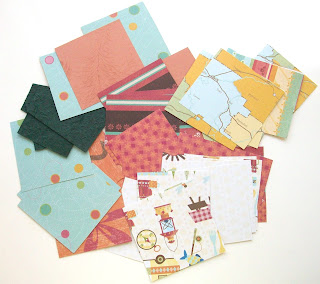
Cut some paper roughly into 4 inch squares. I used double sided scrapbook paper, but use what you've got on hand.


Let the kids cut and decorate 12 pieces however they like. Take the safety pin and poke a hole at the top of each decorated piece. Take some thread and a needle and tie a knot at the top of each piece. (**I used thread and yarn. Feel free to substitute for ribbon, twine, fishing wire, etc. Use what you've got.)


For this next step I found it easiest to hang the mobile from a clothes hanger at the top of a door frame. Use the needle and attach each piece to the bottom of the mobile at the prepared black dot spaces. I originally was going to arrange them in a certain order, starting with a really short string and ending with the longest. But that's just not what ended up happening.


At this stage you can decorate the cardboard circles if you want. I had planned on wrapping it in ribbon to give it a finished nice look, but my son was a little too impatient for that. He just wanted to hang it up. So that's what we did.


I hung it from the ceiling in his room with a push pin tack. I'm not sure how good of an idea that was... within 30 seconds he was running and jumping trying to hit it. Then standing up on chairs and jumping off them trying the same thing. But as he was going to bed he said, "Mom, I'm so glad we made that special craft today. I really love my new thing... what's it called again? It makes me happy to look at." That gave me a huge smile to end my day with. :)

Thursday, June 21, 2012

Star Crayons

This is one activity that I've been wanting to do for a long time. I've been on the hunt for good silicone molds to make crayons, but haven't seen any that I liked. Then earlier this week I saw these rubber star shaped ice cube trays at Target and I knew they'd be perfect. With 5 pointy parts on each crayon, that's 5 times the sharp ends for the kids to wear down. So here's how to make them.

First have the kids go through your crayon box and take out the broken pieces. Sort them by similar color, then take off all the paper.


Now for your part. Take an empty can (this one is from some pineapple we ate for lunch). Wash it and be careful not to cut yourself on any jagged edges.


Put the crayons in can. Take a small pot and cover the bottom with about an inch of water. Put the can in the pot, making a sort of double boiler.


Turn the stove on to medium heat and let the wax melt.


Use a set of pliers to securely pick up the hot can when all the wax has melted. I put a hot pad mitt on my other hand, just in case.


Pour the melted wax into your mold. Let it sit in one spot until it cools. It might sink in the middle as it cools.


If you're using a silicone mold it's a little easier. You can place the broken crayon pieces directly in the mold. Then place on a cookie sheet and pop it in the oven turned on low. Let it sit for about 10-20 min, checking frequently. Remove from the oven when all the wax is melted and let it cool on the counter. Do not try this with rubber molds, because they might melt in the oven as well.

The kids thought it was so cool to color with stars. My son kept asking for swirled colors, so we just might have to make more.